It’s now easier to build your own Piso Wifi Vendo Machine with the release of AdoPiSoft Hotspot Machine DIY (Do it Yourself) Kit for both Raspberry Pi and Orange Pi. It has all the necessary components (except piso wifi vendo box) to build a fully functional piso wifi vendo machine.
Here’s the best thing, AdoPiSoft Hotspot Machine DIY Kit comes with AdoPiSoft Business License and E-loading Activation Code! Plus, this kit has 2 variations you can choose from:
- Pre-configured Kit
SD Card is already flashed with AdoPiSoft RPi or OPi software image.
Newifi D2 is already configured for VLAN. - Not configured
All components will be shipped as is. Newifi is in factory default, SD Card is sealed and empty, Raspberry Pi/Orange Pi is also sealed in a box.
Let’s take a look what components are included in this bundle:
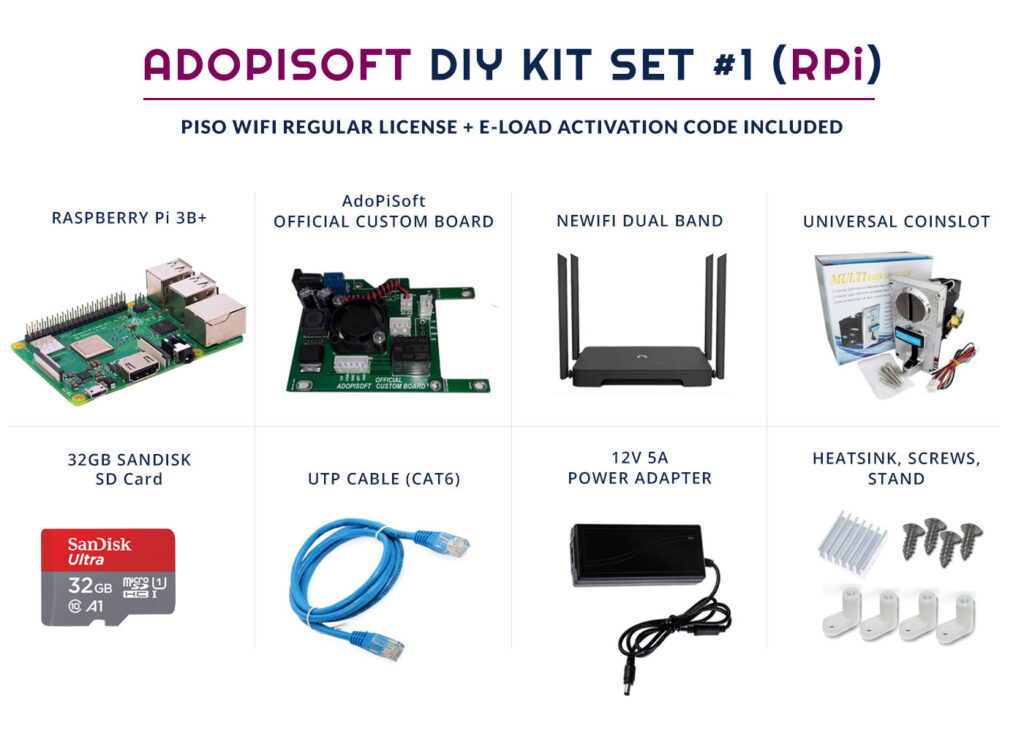
DIY Kit Set #1 for RPi
Available at our AdoPiSoft Official Shopee Store
-Raspberry Pi 3B+
-AdoPisoft Official Custom Board (with stand and heatsink)-
-Newifi 3 D2
-32GB Sandisk SD Card
-UTP Cable (Cat 6)
-12V 5A Power Adaptor
-Universal Coinslot
-AdoPisoft Business Wifi License Key
-AdoPiSoft Eloading Activation Code
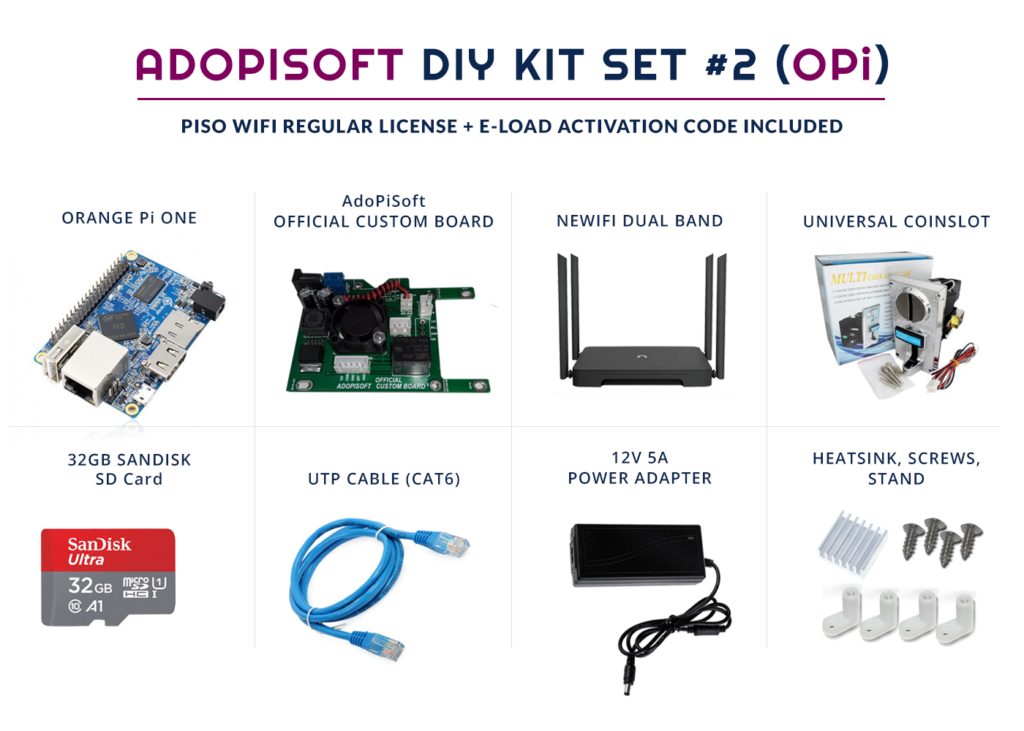
DIY Kit Set #2 for OPi
Available at our AdoPiSoft Official Shopee Store
-Orange Pi One
-AdoPisoft Official Custom Board (with stand and heatsink)
-Newifi 3 D2
-32GB Sandisk SD Card
-UTP Cable (Cat 6)
-12V 5A Power Adaptor
-Universal Coinslot
-AdoPisoft Business Wifi License Key
-AdoPiSoft Eloading Activation Code
Steps on how to assemble AdoPiSoft Hotspot Machine DIY Kit (for both Raspberry Pi and Orange Pi)
Pre-configured DIY Kit:

Step 1. Insert SD Card to Raspberry Pi/Orange Pi
Insert SD Card to Raspberry Pi / Orange Pi SD Card Slot. Since it’s already pre-configured, it means that your SD Card is already flashed with AdoPisoft software image.
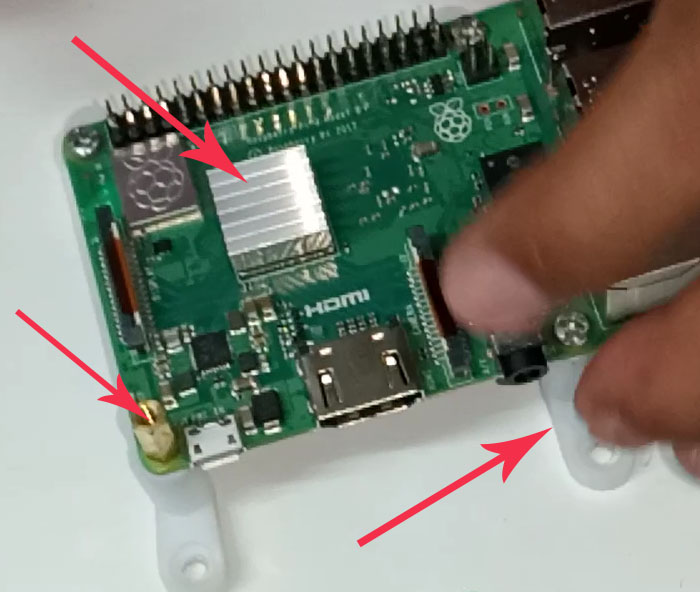
Step 2. Attach Stand and Heatsink
Attach the stand that comes along with the custom board to Raspberry Pi/Orange Pi.
Now place the heatsink, above the processor of Raspberry Pi/Orange Pi.
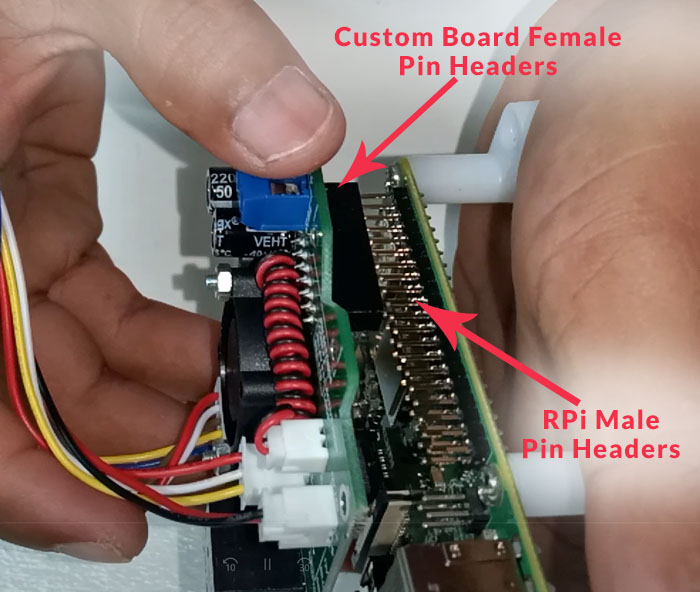
Step 3. Attach custom board to Raspberry Pi/Orange Pi
Insert RPi/OPi male pin headers to custom board female pin headers. Note also that you need to cut the tip part of the custom board if it’s used for RPi.
Step 4. Connect Custom Board Dupont Wires to Coinslot
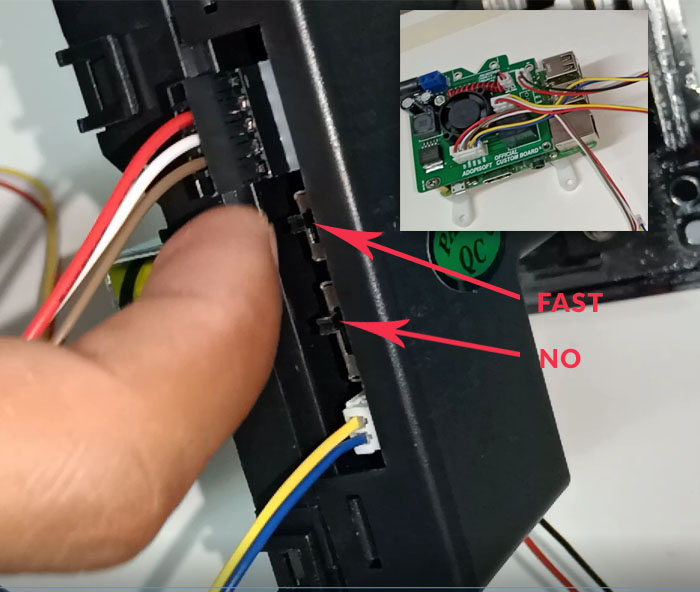
We shipped these AdoPiSoft custom boards with the wires already attached to its correct pins. There are only 3 sets of wires in the custom board.
• For the coinslot (12v, Coin, Ground, Set Pin and another Ground
• Red and Blue Power Indicator
• 12v LED indicator
Please refer to the photo for the correct position of the custom wires. Coinslot should also be set to “Fast” and “No”.

Step 5. Insert UTP cable to RPi/OPi LAN Port and Newifi Port #1
Insert one end of your UTP cable to RPi/OPi LAN Port and the other end to Newifi LAN #1.

Step 6. Insert UTP Cable to Router and Newifi Blue Port
Insert one end of another UTP cable to Newifi Blue Port and the other end to your Router/Modem LAN port.

Step 7. Plug in Custom Board and Newifi Power Adapter.
Plug in your custom board power adapter and Newifi power adapter. One indicator that your RPi/OPi boots successfully is when a green light indicator appears.
You should see also a blue light indicator above your Newifi power icon, above 2.4G and above 5G.
Step 8. Connect to AdoPiSoft Hotspot
Now that you’ve those all set, let’s test if you have a working piso wifi machine.
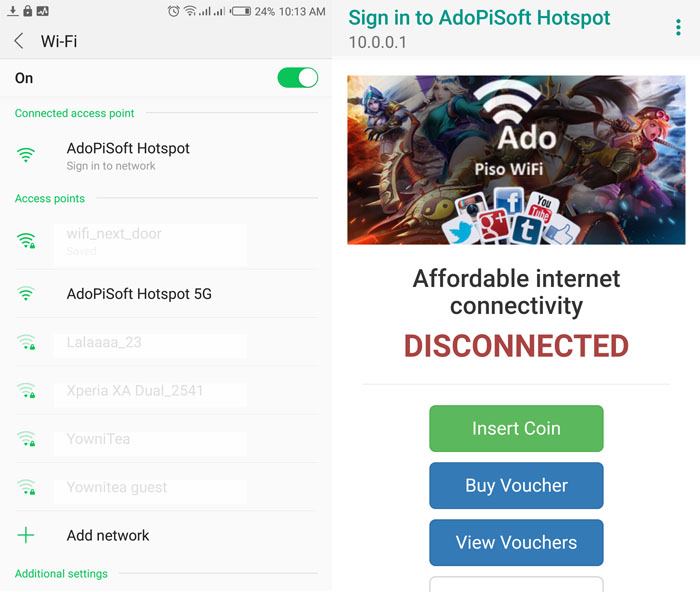
Open your device wifi settings
Connect to AdoPiSoft SSID
A “Sign in to network” will appear which will redirect you to captive portal once you clicked it. Or you can open your device browser, type 10.0.0.1 and you should see the captive portal.
And that’s it, you now have a working piso wifi vendo machine.