Step by step guide on how you can assemble and connect the wireless Adopisoft sub-vendo setup.
This is the full guide to help you configure the NodeMCU and connect it to your Main Vendo.
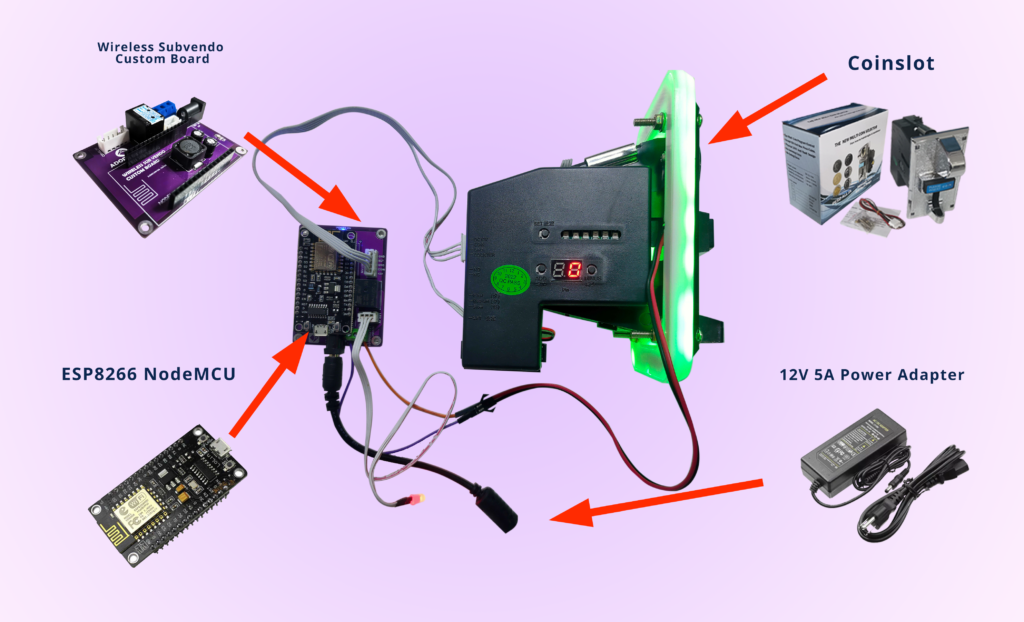
REQUIRED MATERIALS
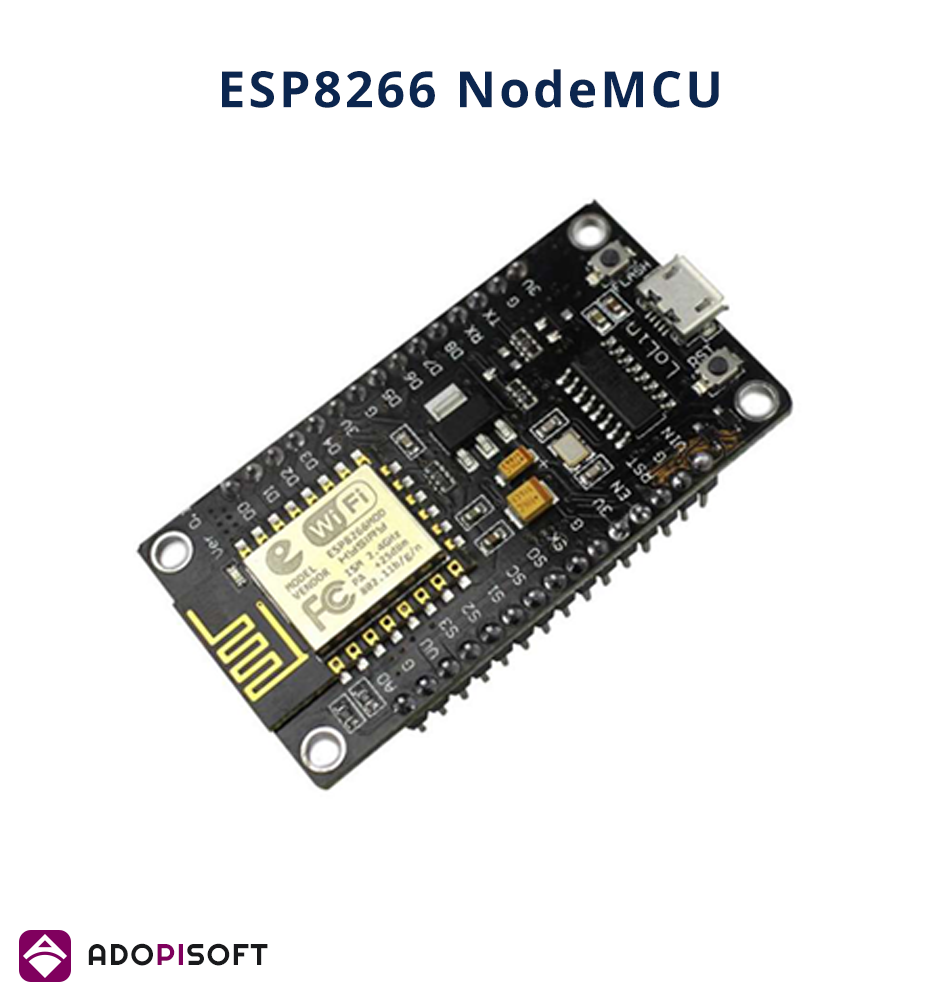
1.NodeMCU
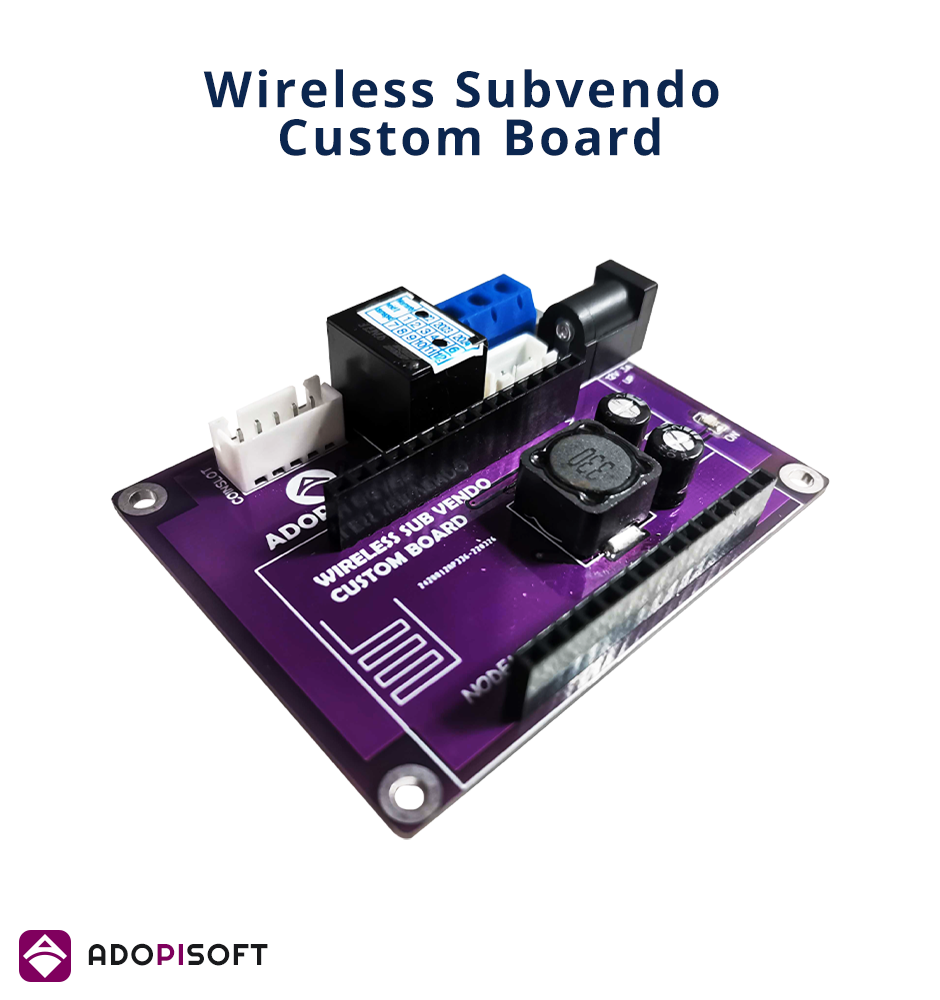
2. Adopisoft Wireless Subvendo custom board
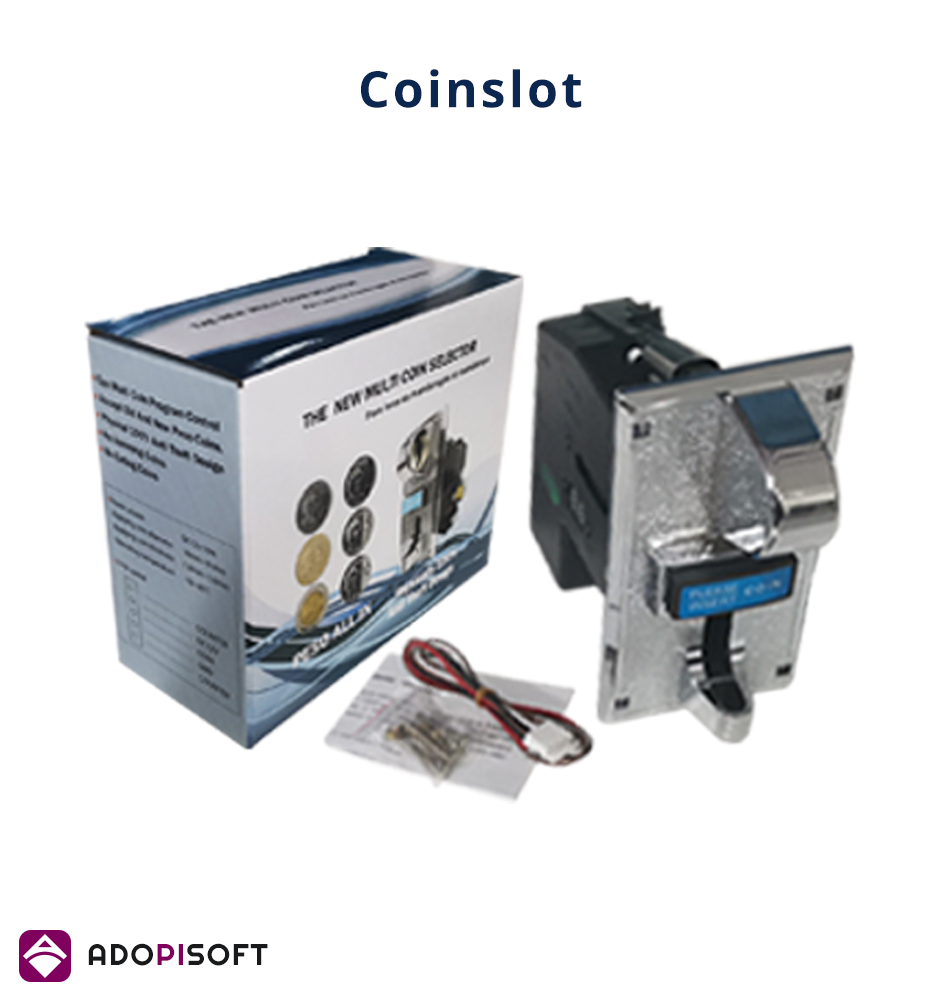
3. Universal Coinslot
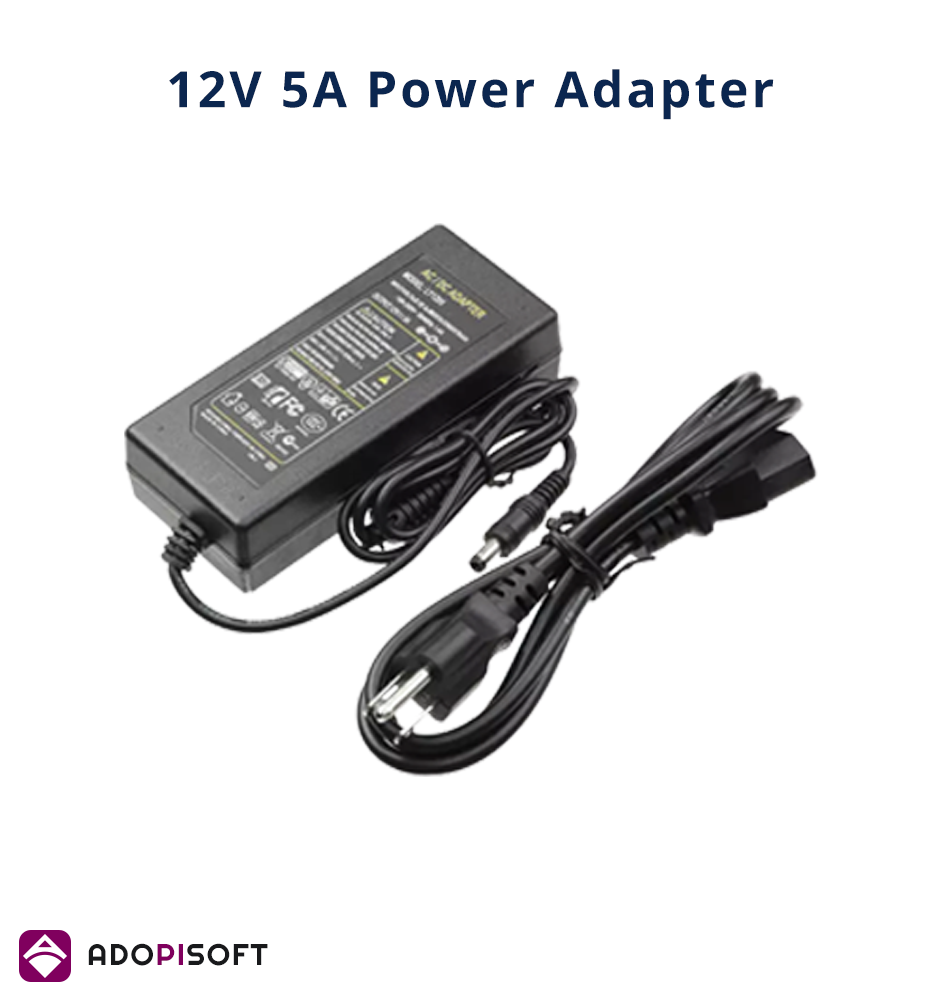
4. 12V 5A power adapter
The step by step guide is found on this link.
The first thing that you need to do is download two files. You can use a PC/Laptop or Android phones by utilizing an OTG. If you are using a PC, follow this steps.
Using PC
Softwares to Download:
- Install PyFlasher
- Download ESP8266 Firmware . Choose the latest bin file. The one suffixed with D8-reset is if you want to use D8 for physical reset button. The one suffixed with D8-buzzer is if you want to use D8 for buzzer module.
After downloading the needed softwares, connect the ESP8266 Board to your PC and determine the COM Port.
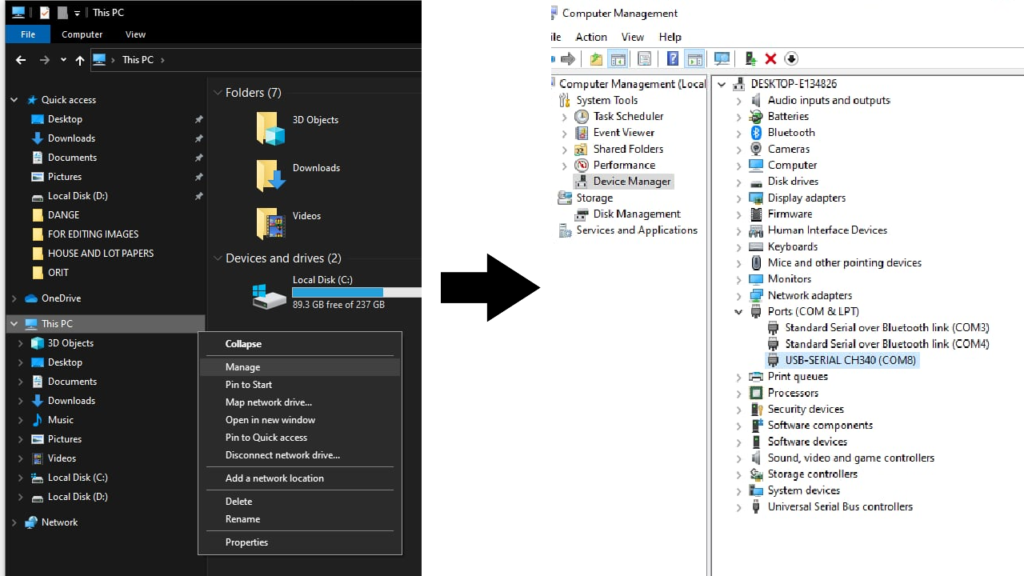
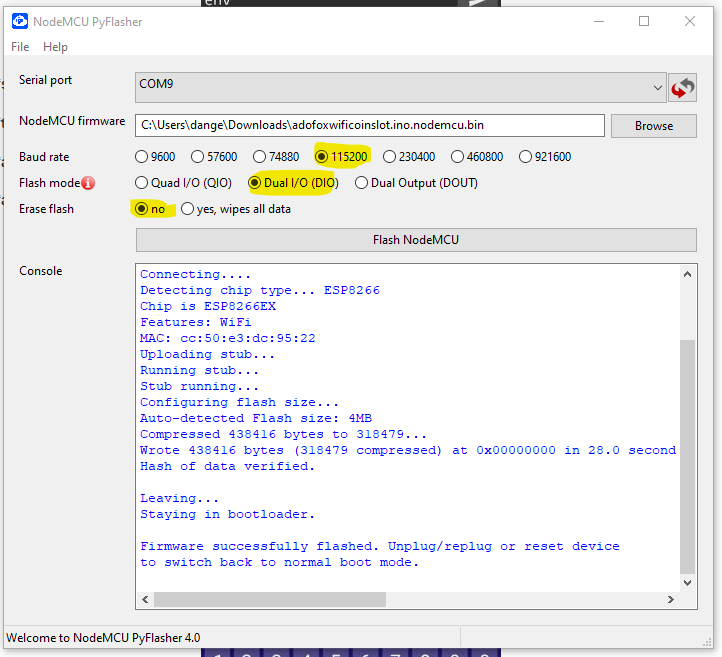
Open PyFlasher. Set proper COM PORT.
Browse the ESP8266 firmware you downloaded (esp8266-firmware-xxxxx.bin).
Set the Baud Rate to 115200.
Using Android Phone
Softwares to Download:
- Install ESP8266 Loader
- Download ESP8266 Firmware . Choose the latest bin file. The one suffixed with D8-reset is if you want to use D8 for physical reset button. The one suffixed with D8-buzzer is if you want to use D8 for buzzer module.
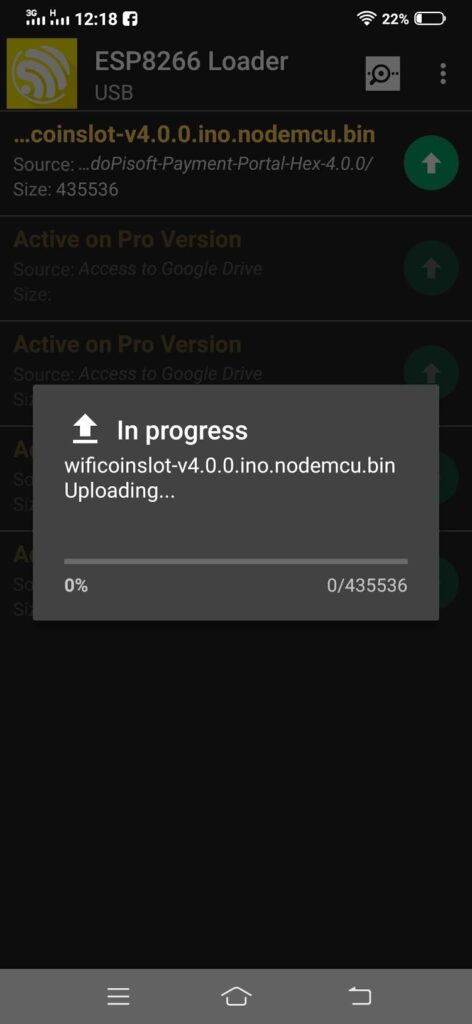
After downloading the needed softwares, connect the ESP8266 Board to your Android phone via OTG. Make sure you enable the OTG setting on your android.
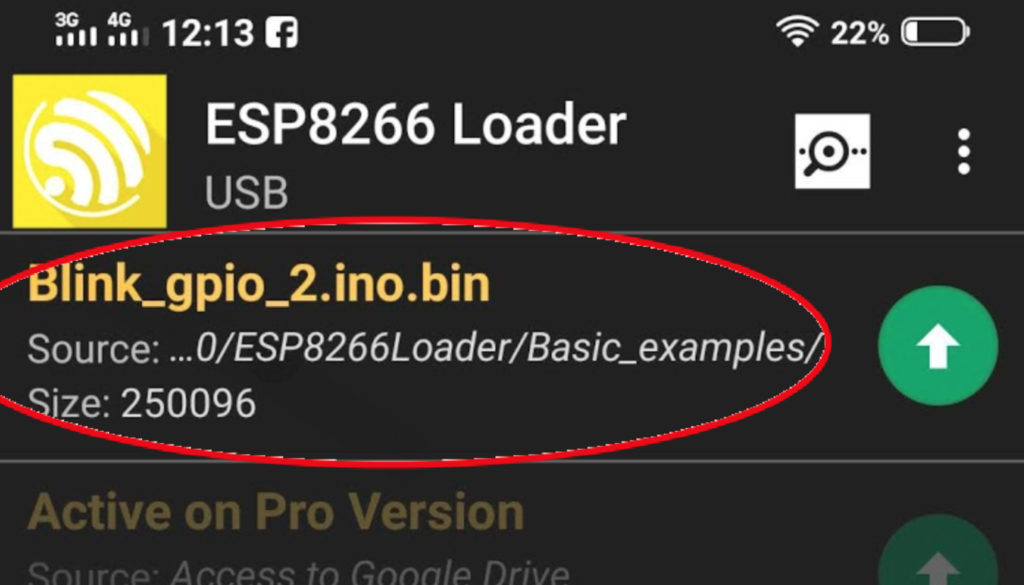
Open ESP8266 Loader App and tap Allow on the permission prompts.
Then tap on the source item to select the esp8266 firmware.
Wiring Diagram
Basic wiring diagram
Materials needed:
- NodeMCU or WEMOS
- Universal Coin Acceptor
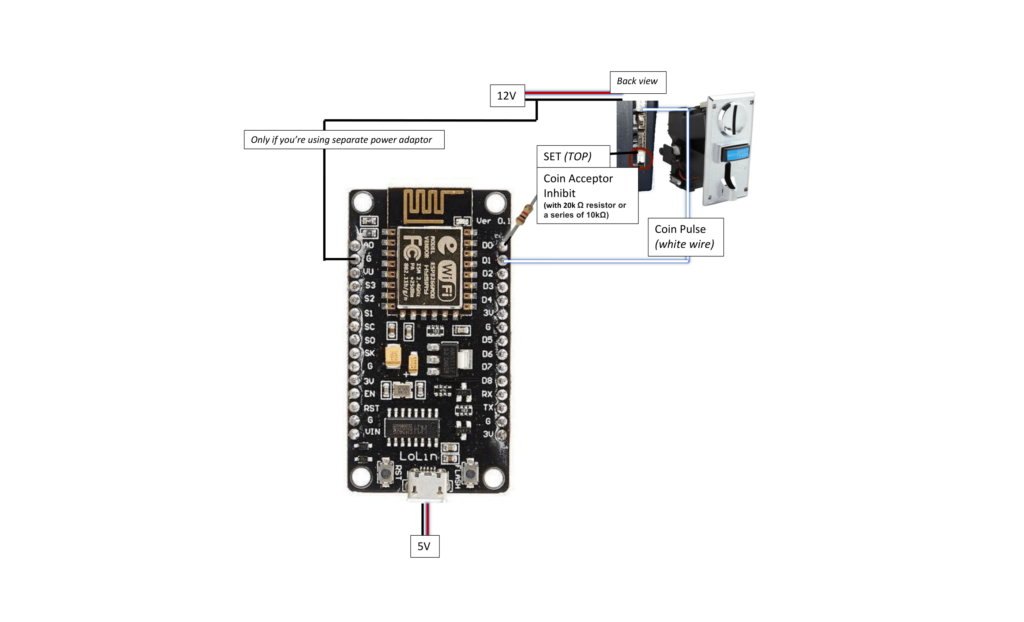
Just follow all the placements and wiring that you can see on the picture.
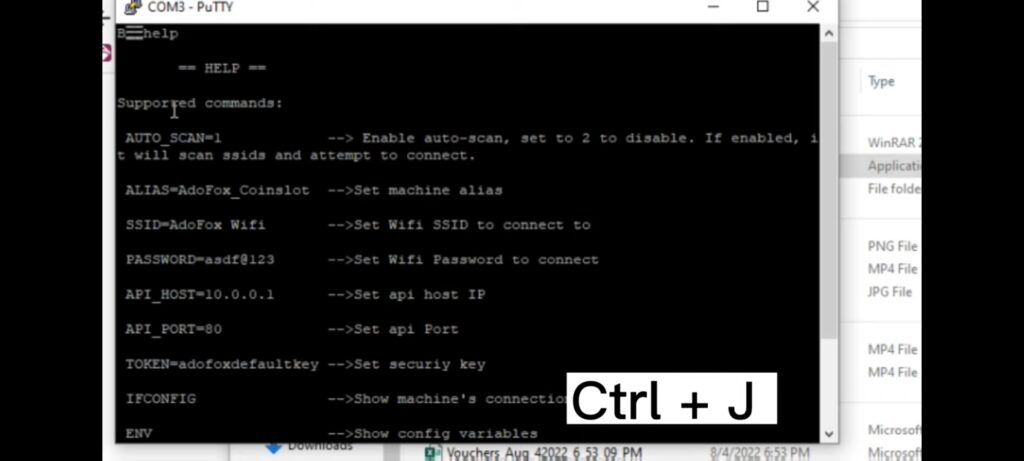
Configure the NodeMCU
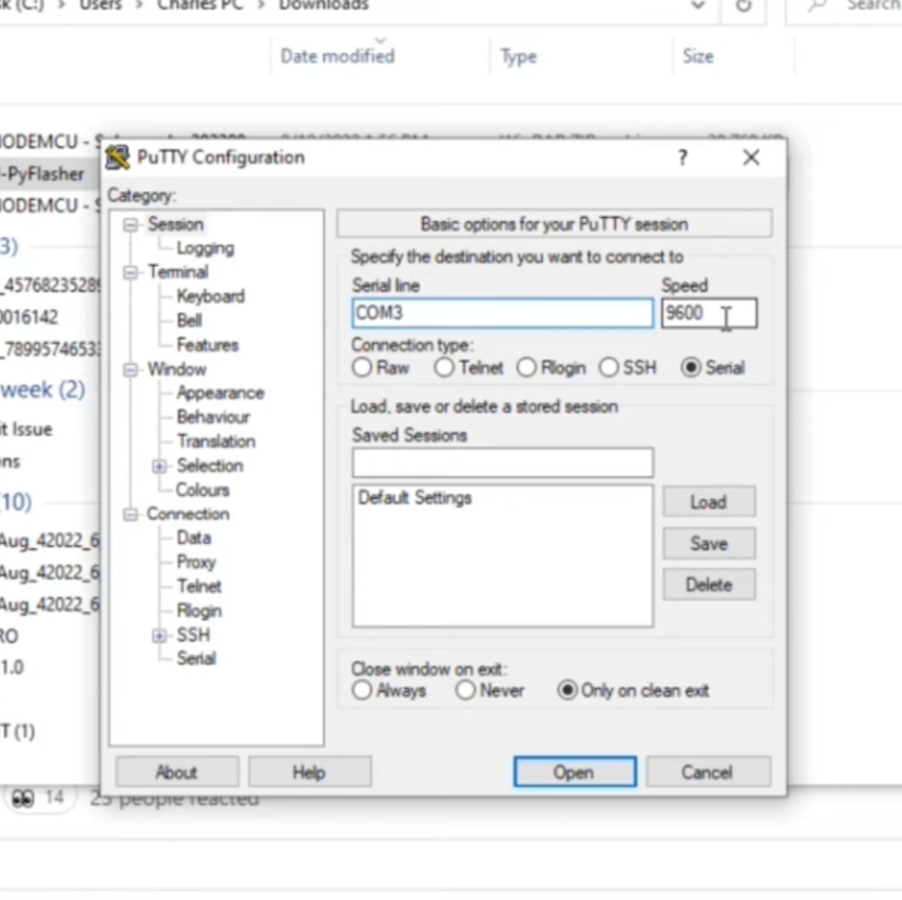
Download putty
Choose the version that is compatible with your laptop or pc.
Set-up putty.
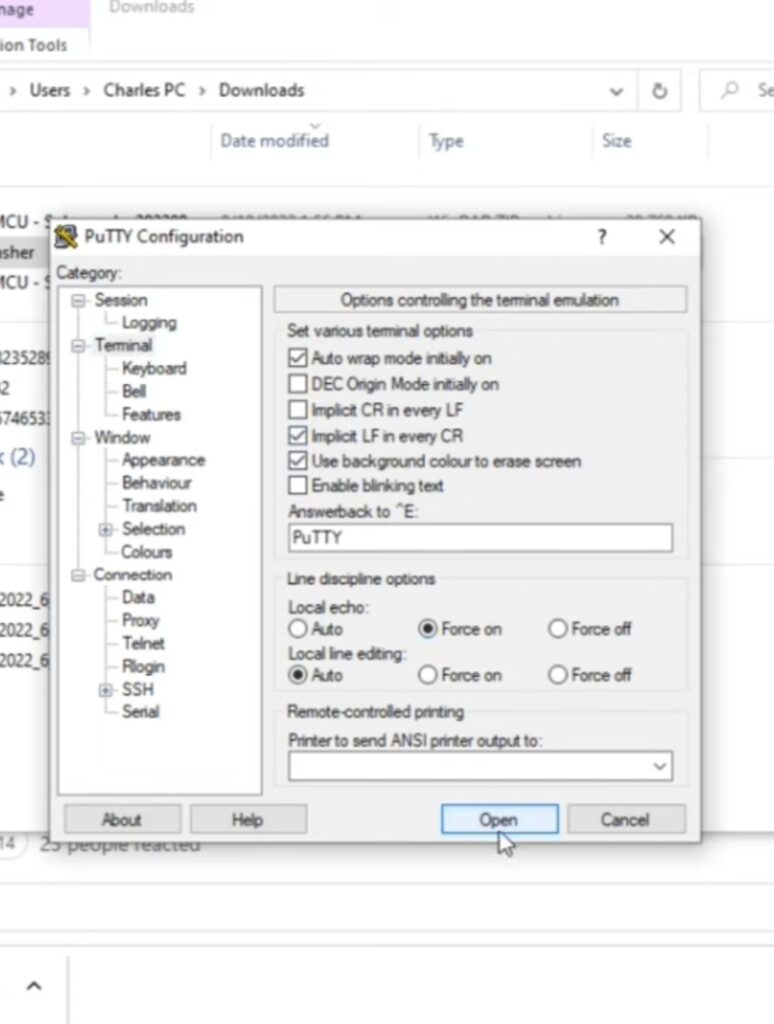
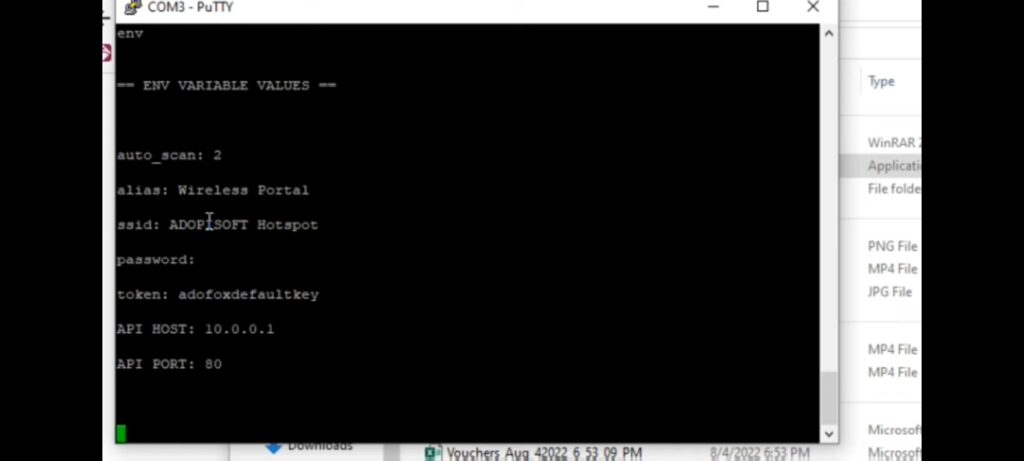
Type help to access all commands and press CTRL + J to enter.
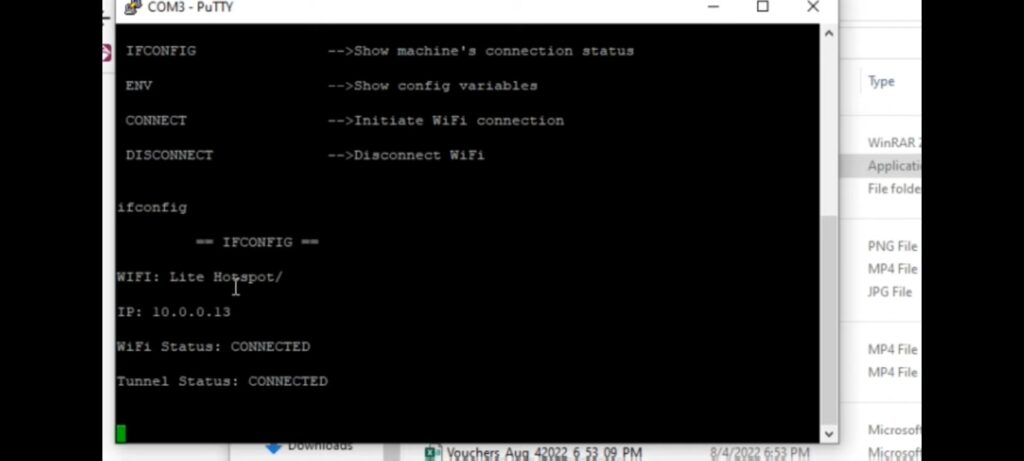
Type ipconfig to check on what SSID(name of wifi router or accespoint) the NodeMCU is currently connected.
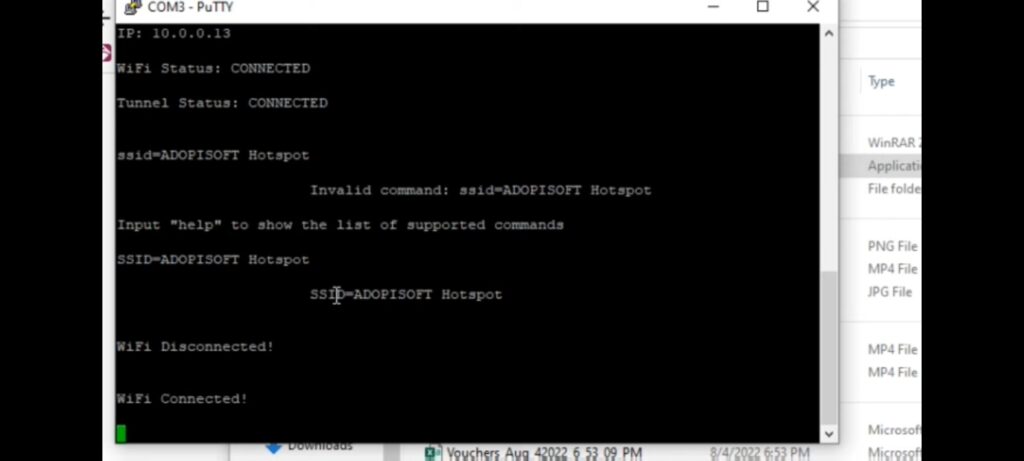
type SSID= the SSID of the router or accesspoint you want it to connect to and then press
CTRL + J again
tip: Type fast, otherwise the command will not not be executed.
type ipconfig again and press CTRL + J to check if the SSID was updated.
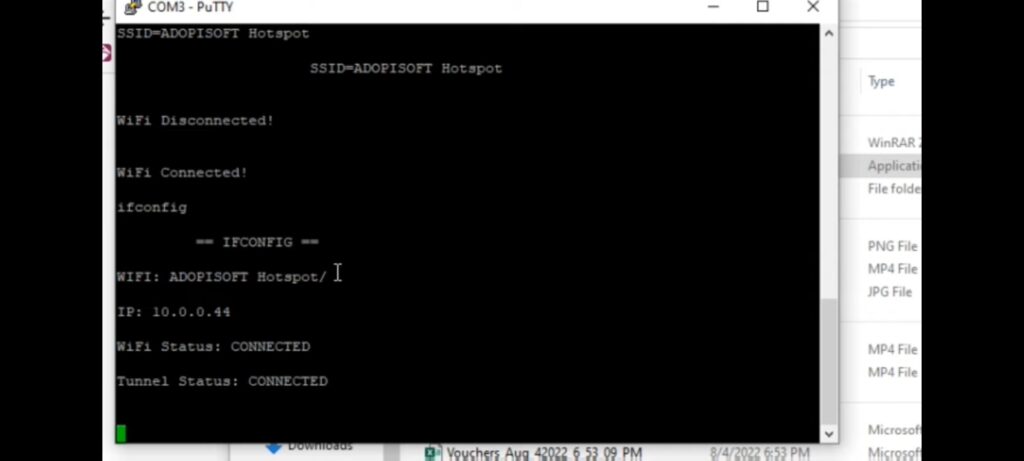
Type AUTO_SCAN=2 to lock the connection between the NodeMCU and your SSID to prevent it from connecting to any other SSID when it restarts or when a stronger signal coverage is present.

Type env to see the updated status.
Payment Portal Settings
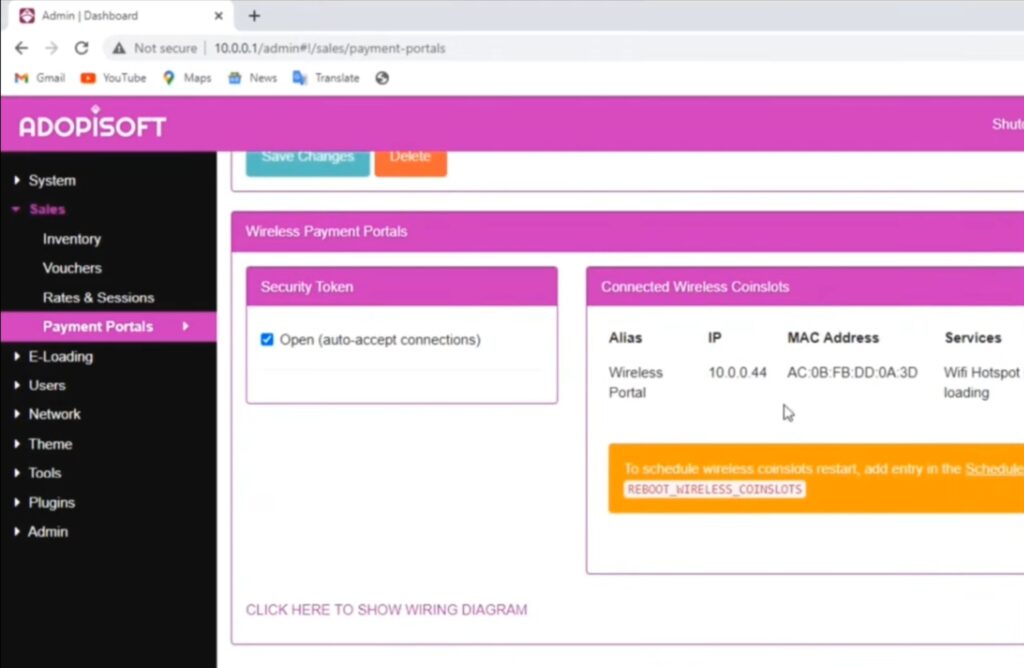
Open (auto-accept connections)
By default, your NodeCMU is set to auto scan. It means it will automatically scan wifi ssids and attempt to connect. If this setting is turned ON, your main vendo will automatically accept the connection request from sub-vendo. You will only turn this ON for setup purposes. After the sub-vendo has connected to your main vendo, fill the Token field and check/tick Automatically apply changes to connected devices and hit Save Changes
Security Token
Security token is the pre-shared token by your main vendo and your sub-vendo/s. Main vendo will only accept connection request from sub-vendos if they have matching security token, unless (auto-accept connection) is enabled.
read also: https://blog.adopisoft.com/article/fix-coinslot-not-working
0 Comments